
INTRO
These instructions are for the assembly of the Mini Tokamak Reactor kit. For a basic introduction to model assembly, please see our article on that subject here.
For everyone else, please cut and sort your parts, and let's get to it!
PLEASE NOTE: THESE INSTRUCTIONS ARE A WORK IN PROGRESS.
All photos in here should be ordered appropriately, but we're still working on filling in helpful text that will add context and advice for the various steps. If you have trouble following any of these steps, please reach out to steak@globalevilcorp.com and we'll do out best to help while we finish these instructions.
Thanks!
------------------------------


NOTE: In this next step we use the final mounting platform to align all of the other piece for assembly. DO NOT GLUE THE FOLLOWING TWO PIECES TOGETHER AT THIS STEP IN THE PROCESS. You will be instructed to glue them up near the end of the assembly.

These fins are pretty fragile. Please make sure you test fit the pieces and don't force anything. A hobby file is super useful to adjust the fit!


Once you have let the glue dry for a little bit, detach these parts so we we can return to them later.

Next we'll prep all the door/hatch hinges.

You'll need two hinges in each orientation as shown below.

Similar to how we used the base plate for the radiator to help us align and stabilize the fins, we'll use the doors to help us make sure the hinges are snug and well aligned.
DO NOT GLUE THE HINGES TO THE WALLS AND ROOF RIGHT NOW OR YOU WON'T BE ABLE TO ATTACH THE DOORS LATER!


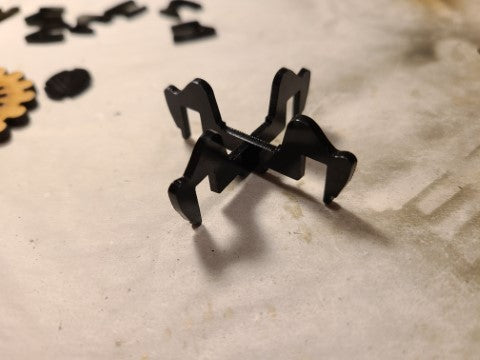
Now for the most obnoxious parts in this entire kit! YAY!
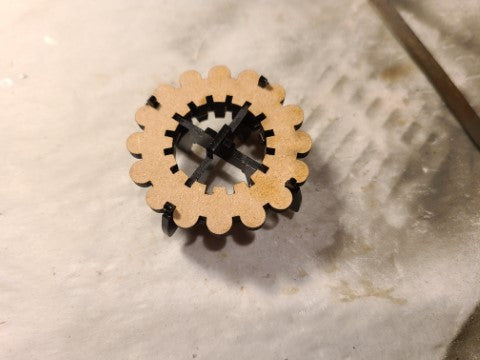
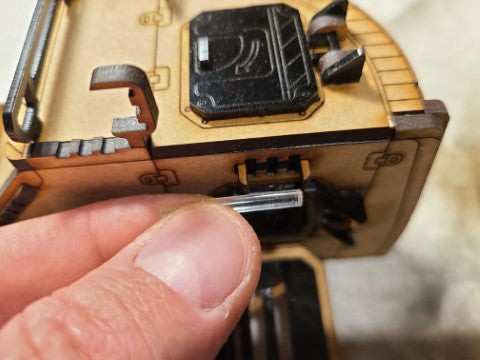
These are the parts that go into the industrial lamps by the two hatches. You should have one clear rod (that needs to be cut to length), and two sets of black cage bands. If you look closely, you'll see that the black bands are two slightly different shapes, three with rounded legs, and three with straight legs. Separate them out by type, and let's get started by cutting and measuring the rod.

The clear rod needs to be cut into two pieces, and you should have more than you need to fit both spaces. I recommend measuring the amount you need as shown in the following pictures, and then cutting slightly over using a pair of snips (if you don't have snips, score a line with a blade around the area you want to break, and then bend it until it snaps. It should break pretty close to your line). Once you have it trimmed close to size, file it down to a nice fit with some hobby files or sandpaper.


Once the rod is cut to length, gather the three black pieces with the straight legs, and insert the rod through them. This will be the light figure above the hatch on the walkway.


Add some glue to the recess above the door, and carefully align the light fixture into the holes.


Now we'll do the same procedure using the rounded leg pieces. This will be the light on top of the reactor by the second hatch.

Add glue into the notches, and insert the light.

Lastly, glue the radiator onto the mounting plat of the reactor, making sure to alight the caution sign in the vertical orientation.


And now your Mini Tokamak Reactor kit is complete!


